Ready-made mushroom substrate now comes in more formats than ever: dry bricks, hydrated bags, sterile blocks, all-in-one bags. The labels rarely tell you which one you actually need. The good news is that the decision follows a simple order: species first, then treatment, then format, then quantity, then a quick check of the bag itself. This guide walks through each step without the sales pitch.
Step 1: match the substrate to the species
Every mushroom has a preferred food, and no single substrate suits them all. This is the decision that matters most.
| Species | Fruits best on | Treatment | Good first grow? |
|---|---|---|---|
| Oysters (blue, pearl, pink, golden) | Coir and vermiculite, straw, supplemented hardwood | Pasteurized (CV, straw) or sterilized (supplemented hardwood) | Yes |
| King oyster | Supplemented hardwood, such as masters mix | Sterilized | After a few grows |
| Lion's mane | Supplemented hardwood sawdust | Sterilized | After a few grows |
| Shiitake | Supplemented hardwood sawdust, or hardwood logs | Sterilized (sawdust) | For patient growers |
| Maitake, reishi | Supplemented hardwood sawdust, logs | Sterilized | Advanced |
| Wine cap | Hardwood chips or straw in an outdoor bed | Usually none | Yes, outdoors |
| White button, cremini and portobello | Composted, manure-based substrate with a casing layer | Composted and pasteurized | No |
If you are growing oysters, a pasteurized coir and vermiculite substrate is the forgiving choice. If you are growing a wood lover, coir won't do: you need supplemented hardwood, which we do not sell. Our comparison of CV vs masters mix goes into that split in detail, and mushroom substrate types covers the wider list.
Step 2: sterile or pasteurized?
Ready-made substrates come in two broad kinds, and the difference is mostly about how much food is in them.
| Pasteurized | Sterile | |
|---|---|---|
| Typical ingredients | Coir and vermiculite, straw | Hardwood sawdust with bran or soy hulls |
| Heat treatment | Roughly 60 to 80°C (140 to 176°F) | About 121°C (250°F) under pressure |
| Nutrient level | Low | High |
| What is left alive | Some harmless heat-tolerant microbes | Nothing |
| Contamination tolerance | Forgiving | Low once exposed to open air |
| Handling | Clean hands and surfaces, work quickly | Inject through a port, or open only in a still air box or flow hood |
| Spawn rate | Generous | Lower |
| Shelf life | Shorter: use fresh | Longer while sealed |
The trade-off is simple. Nutrients give you a bigger harvest potential, but they also feed every mold and bacterium that gets in. Low-nutrient pasteurized substrates give up some yield in exchange for being much harder to ruin. Rich sterile substrates give more, but only if your technique is clean. Our guide to pasteurized vs sterilized substrate explains the science behind it.
Step 3: pick a format
Once you know the substrate and treatment, choose how much of the preparation you want to do yourself.
- Dry bricks and loose ingredients. Coir bricks, vermiculite or hardwood pellets that you hydrate and heat-treat yourself. Cheapest per grow, but messy and time-consuming, and getting the water and the heat treatment right takes practice.
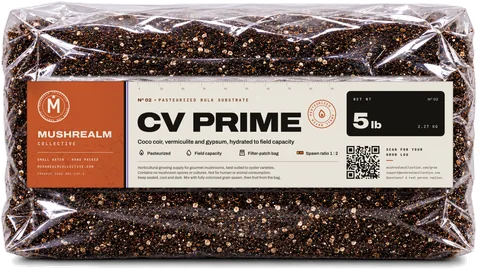
- Hydrated, pasteurized bags. Ready to use: open, mix in colonized grain, and fruit. No measuring, no heating. CV Prime is this kind.
- Sterile supplemented bags or blocks. For wood lovers. You add grain spawn cleanly, ideally through a port or in a still air box.
- All-in-one bags. Grain and substrate together in one sealed bag. Simple, but the ratio is fixed. See grow kit vs all-in-one bag for the pros and cons.
- Ready-to-fruit blocks. Substrate already colonized by the seller. Less a substrate purchase than a finished grow.
Step 4: work out how much to buy
How much substrate you need depends on how much grain spawn you have and the spawn rate you want.
- Spawn rate for coir and vermiculite: growers commonly use between 1 : 1 and 1 : 4 grain to substrate by weight. More grain colonizes faster and leaves less room for contamination. Less grain stretches your spawn further but runs slower. We pair our kits at about 1 : 2.
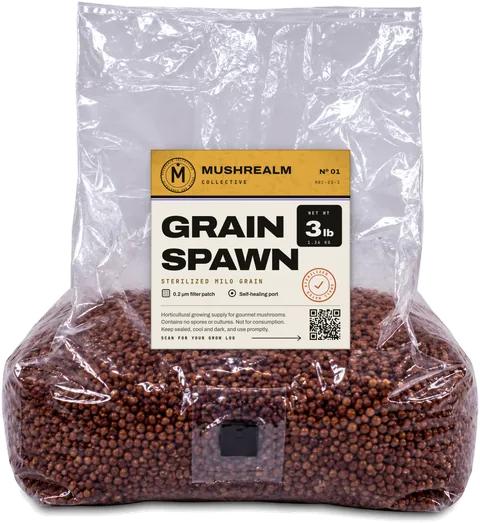
- A single grow at about 1 : 2: one 1.4 kg (3 lb) grain bag with one 2.3 kg (5 lb) bag of CV Prime.
- Several grows: the spawn to bulk calculator works out grain and substrate for any number of grows at the ratio you choose.
Two practical tips. First, buy only what you will spawn within the maker's freshness window, because pasteurized substrate is not something to stockpile. Second, time your order so the substrate arrives when your grain is close to fully colonized. For oysters, grain usually takes a few weeks to colonize, so order the substrate once the grain is well on its way rather than on the day you inoculate.
Step 5: what to check on the bag
Whoever you buy from, these checks take a minute and catch most problems before you commit your grain.
- Filter patch. Sterile bags, and any sealed bag the mycelium will grow in, need a filter patch so the contents can breathe. Make sure it is intact, dry and not covered by a label. Our grain bags use a 0.2 micron patch.
- Moisture at field capacity. The substrate should look evenly damp. Once opened, a hard squeeze of a handful should give a few drops, not a stream. Water pooled in the corners means too wet, and a dry, crumbly texture means too dry. More in field capacity explained.
- Dates. Look for a production, pasteurization or best-before date, and plan to use it well within that window.
- Seal and bag. No punctures, splits or loose seals.
- Look and smell. Even color, with no green, black, orange or pink spots. A fresh, earthy or neutral smell. Sour or rotten smells mean bacteria, and a strong ammonia smell in a compost-based substrate means it was not finished. Our substrate contamination guide shows what to look for.
- Weight, like for like. A hydrated substrate is mostly water by weight, and a dry brick is not. Compare hydrated with hydrated when you compare prices.
- What it is for. A good label tells you which species and which treatment the substrate suits.
- The arrival policy. Find out what happens if a bag arrives damaged. Ours: if a bag arrives contaminated or damaged, send a photo within 7 days and we replace or refund it (see our returns page).
Common buying mistakes
These are the mismatches we see most often, and each one is easy to avoid:
- Buying rich, sterile substrate for oysters. It works, but it needs cleaner handling than a first grow usually gets. A pasteurized coir and vermiculite bulk is far more forgiving.
- Buying coir and vermiculite for a wood lover. Lion's mane, shiitake and king oyster fruit poorly on it, however well you do everything else.
- Buying a format that needs equipment you do not own. Supplemented sawdust you sterilize yourself means a pressure cooker. Check before you order.
- Comparing prices across wet and dry products. A dry brick looks cheaper per kilo until you account for the water, the heat treatment and your time.
- Ordering substrate before the grain is ready. Pasteurized substrate waiting weeks for slow grain is substrate past its best.
- Not enough grain for the substrate. A thin spawn rate slows colonization and gives competitors a head start. When in doubt, add more grain, not more substrate.
Quick checklist
- Species first: oysters on pasteurized coir and vermiculite, wood lovers on sterilized supplemented hardwood.
- Pasteurized is low-nutrient and forgiving; sterile is rich and needs clean handling.
- Choose a format based on how much preparation you want to do.
- Size the order to your grain spawn: about 1 : 1 to 1 : 4 for coir and vermiculite, and use the spawn to bulk calculator.
- Check the filter patch, moisture, dates, seal and smell before you spawn.
- Buy fresh and spawn promptly.
Frequently asked questions
What is the best mushroom substrate for beginners?
What is the difference between sterile and pasteurized substrate?
How much substrate do I need for one bag of grain spawn?
How long does ready-made mushroom substrate last?