Oyster mushrooms are the best first gourmet species to grow at home. They colonize fast, shrug off small mistakes and fruit happily from a bag of coir and vermiculite (CV) on a kitchen shelf. This is the full run we use on the MushRealm bench, from a sterile grain bag to a second flush, with the temperature, humidity and timing for every stage.
What you need
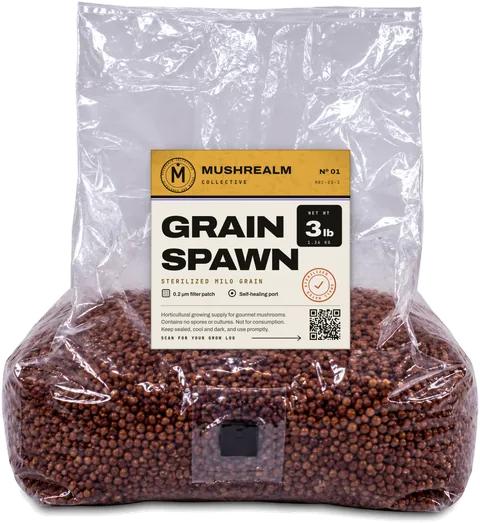
- A sterilized grain bag. Our grain spawn (a 1.4 kg (3 lb) milo bag) comes hydrated, pressure-sterilized and sealed with a filter patch and a self-healing injection port, so there is nothing to cook.
- Live mycelium of an oyster strain, such as a liquid inoculant or colonized grain from a previous bag.
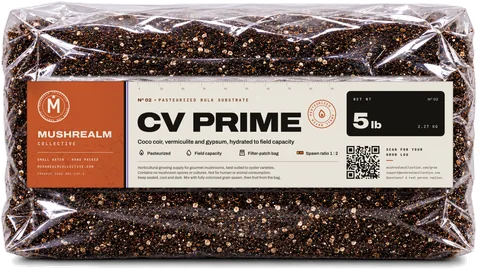
- CV substrate. CV Prime is pasteurized and hydrated to field capacity, so you mix the grain straight in and fruit from the bag.
- 70% isopropyl alcohol, nitrile gloves, clean scissors, a fine-mist spray bottle and a cheap digital hygrometer.
- A spot with indirect daylight that holds the right temperature for your variety.
The timeline at a glance
| Stage | Temperature | Humidity | Light and air | Typical time |
|---|---|---|---|---|
| Grain colonization | 21 to 24°C (70 to 75°F) | Sealed bag | Dark or dim, bag stays closed | 2 to 3 weeks |
| Bulk colonization in CV | 21 to 24°C (70 to 75°F) | Closed bag | Dark or dim | 10 to 14 days |
| Pinning | Variety range (below) | 90 to 95% | Indirect light 12 h a day, lots of fresh air | 3 to 7 days |
| Pins to harvest | Variety range | 85 to 95% | Same | 5 to 7 days |
| Rest, soak, second flush | Variety range | 85 to 95% | Same | 1 to 2 weeks |
From inoculating the grain to the first harvest usually takes about 5 to 7 weeks. Start with fully colonized grain and you can be cooking oysters in about 3 to 4.
Step 1: Colonize the grain
- Work in a still room with clean hands and gloves. Wipe the injection port with alcohol and let it dry.
- Add live oyster mycelium through the self-healing injection port. Our inoculation guide covers the exact technique.
- Label the bag with the variety and date, then incubate it at 21 to 24°C (70 to 75°F) out of direct light.
- Expect white fuzz around the injection point within 3 to 7 days.
- At about 30% colonized, break the white clumps apart through the plastic and shake to spread them through the grain.
- Wait until the bag is white on every side, including the bottom, then give it 2 to 3 more days to firm up.
Oyster mycelium is fast, bright white and fluffy. Small yellow droplets on it are normal metabolites. Green, gray-black or orange patches, or a sour smell, are not.
Use the spawn within about a week of full colonization. Oysters left too long start pinning inside the grain bag. A fridge buys time for most varieties, but never refrigerate pink oyster, which is damaged by cold.
Step 2: Mix the grain into CV at about 1:2
About 1 part grain to 2 parts substrate by weight colonizes quickly and leaves plenty of CV to hold water for later flushes. Our single kit pairs 1.4 kg (3 lb) of grain with 2.3 kg (5 lb) of CV Prime. The spawn to bulk guide compares 1:1, 1:2 and 1:3, and our spawn to bulk calculator works out amounts for any number of grows.
- Turn off fans, wipe your table and both bags with alcohol, and put on clean gloves.
- Break the colonized grain into loose kernels while its bag is still sealed.
- Cut open both bags, pour the grain into the CV Prime bag and hold the top closed in your fist.
- Shake, tumble and knead until the grain is evenly spread, with no clumps of grain and no pockets of plain CV.
- Press it gently into an even brick. Do not pack it hard.
- Fold the top over two or three times and clip it. Colonizing mycelium is happy in high CO2, so it needs very little air at this stage.
Do not add water. CV Prime is already at field capacity, and extra water invites bacteria.
Step 3: Colonize the bulk
Keep the bag at 21 to 24°C (70 to 75°F), dark or dim, and leave it closed. Opening it to look only lets mold in.
At 1:2, oysters usually turn CV fully white in 10 to 14 days. Colonizing mycelium makes its own heat, so the middle of the bag can run a few degrees warmer than the room. If the room creeps above about 26°C (79°F), move the bag somewhere cooler.
The bag is ready when you can no longer see brown coir, the block feels firm, and small knots of pins start pushing against the plastic. Oysters tend to tell you when they want to fruit.
Step 4: Set up fruiting conditions
- Cut the bag. Make 2 to 4 X-shaped slits about 3 to 5 cm (1 to 2 in) across, ideally where pins are already forming. Oysters push out of slits in tidy clusters.
- Hold humidity at 85 to 95%. Mist the air around the slits and the walls of your chamber 2 to 4 times a day with a fine spray. Avoid soaking the mushrooms themselves.
- Give fresh air. Oysters want more fresh air than almost any other mushroom. Fan for 10 to 20 seconds after each misting.
- Give light. Indirect daylight or a cool LED for about 12 hours a day. No direct sun, which heats and dries the bag.
You don't need anything fancy. A grow bag on a shelf with a loose clear bag tented over it works, but a DIY fruiting chamber makes humidity much easier to hold. Our fruiting conditions guide goes deeper on each signal.
Fruiting temperature by oyster variety
| Variety | Fruiting temperature | Notes |
|---|---|---|
| Blue, pearl and gray (Pleurotus ostreatus) | 13 to 21°C (55 to 70°F) | Caps darken in cooler rooms; a good fall and winter grower |
| Pink (Pleurotus djamor) | 20 to 29°C (68 to 84°F) | Loves heat, stalls in the cold |
| Golden (Pleurotus citrinopileatus) | 18 to 29°C (64 to 84°F) | Delicate; harvest young |
| King (Pleurotus eryngii) | 15 to 20°C (59 to 68°F) | Fruits best on supplemented hardwood sawdust, not CV |
Pick the variety that suits your room rather than fighting the thermostat. More on each in oyster mushroom varieties.
Step 5: Harvest, then go again
Pins usually reach harvest size 5 to 7 days after they appear, and they grow fastest in the last day or two, so check them daily. Pick when most caps in a cluster are open but the edges still curl slightly down. Once the edges flatten and turn up, the mushrooms are past their best and keep poorly.
- Grip the whole cluster at its base.
- Twist it away, or cut it flush with a clean knife.
- Pick out any stubs or broken bits left in the slit so they don't rot.
Store oysters loosely in a paper bag in the fridge and cook them within a few days. Pink and golden oysters are the most perishable, so eat those first.
The second flush
Mushrooms are mostly water, so the first harvest leaves the block lighter and drier. Rest it for a few days, then, if it feels noticeably lighter, submerge the bag in cold water for 6 to 12 hours, drain it well and return it to fruiting conditions. New pins usually show in 7 to 14 days.
Expect 2 to 3 flushes from CV, sometimes 4, each smaller than the last. The full method is in our second flush guide.
Troubleshooting
| Problem | Likely cause | Fix |
|---|---|---|
| Long stems, tiny caps | Too much CO2 or too little light | Fan more often, add light |
| Pins turn yellow, dry and stop | Humidity too low | Mist more, add a humidity tent or chamber |
| Cracked caps, edges curling up early | Dry air or drafts | Raise humidity, keep drafts off |
| Sticky yellow-brown spots on caps | Water sitting on the mushrooms | Mist the air, not the caps, and fan |
| No pins after 2 weeks | Too warm for the variety, too little air or light | Check temperature, open up airflow |
| Green patches | Trichoderma mold | Seal it in a bag and throw it out |
| Mushrooms forming inside the bag | Left too long, or an air gap in the plastic | Cut a slit right there |
The short version
- Inoculate a sterile grain bag, colonize at 21 to 24°C (70 to 75°F), break and shake at 30%.
- Mix the grain into CV at about 1:2 and colonize for 10 to 14 days in a closed bag.
- Cut slits, hold 85 to 95% humidity, fan after misting and give about 12 hours of indirect light.
- Fruit at your variety's temperature and harvest before the cap edges flatten.
- Rest, soak for 6 to 12 hours, and go again for flush two.
Frequently asked questions
How long does it take to grow oyster mushrooms at home?
Can you grow oyster mushrooms on coco coir?
Do oyster mushrooms need light to grow?
What humidity do oyster mushrooms need?
Why are my oyster mushrooms all stem and no cap?