A jar and a bag do the same job. Each holds hydrated grain in a sterile space while mycelium grows through it, with a filter so the grain can breathe and a port so you can inoculate it without opening it. The mycelium does not care which you choose. What changes is how much work you do, how much you spend up front, and how easy the spawn is to handle when it is time to use it. Here is the honest comparison.
What each setup actually is
Jars. Wide-mouth mason jars of about 1 liter (1 quart), filled two thirds to three quarters with hydrated grain so there is room to shake. The lid is modified with a filter (a synthetic filter disc or a plug of polyester fiber) and a self-healing injection port, usually a dab of high-temperature silicone or a rubber grommet. Every jar is soaked, simmered, filled and pressure sterilized at home.
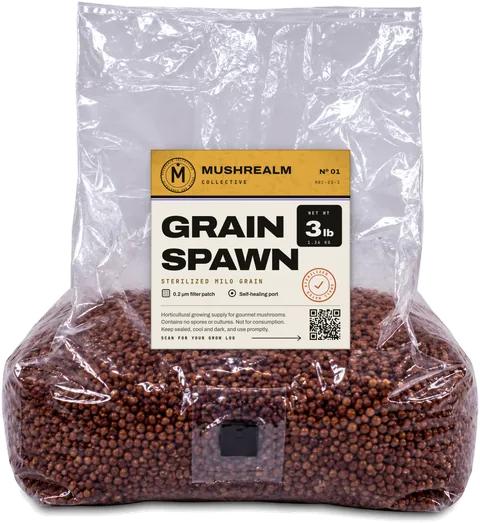
Bags. Heat-resistant polypropylene bags with a filter patch built into one side, often with an injection port too. You can buy them empty and fill, seal and sterilize them yourself, or buy them ready-made with the grain already hydrated and sterilized inside. Our grain spawn is the ready-made kind: fully hydrated milo, pressure sterilized and sealed in a bag with a 0.2 micron filter patch and a self-healing injection port.
The comparison table
| Jars (homemade) | Empty bags you fill | Ready-made sterilized bags | |
|---|---|---|---|
| Up-front cost | Jars, lids, filter material, silicone, plus a pressure cooker | Pressure cooker, bags and a heat sealer | None |
| Running cost per batch | Lowest: grain and power | Low: grain, power, a new bag | Highest per kilo of grain |
| Prep time | Overnight soak, simmer, dry, fill, about 90 minutes at pressure, cool | The same, plus sealing, and about 2.5 hours at pressure | None: inoculate on arrival |
| Pressure cooker | Required | Required | Not needed |
| Contamination risk | Depends on your lid build, sterilizing and cooling | Depends on your seal and sterilizing | Sterilizing is done; your risk is at inoculation |
| Shaking and break-up | Hard: rigid glass, tap against a palm or towel | Easy: squeeze through the plastic | Easy: squeeze through the plastic |
| Capacity | About 1 liter (1 quart) per jar | Roughly two to three jars' worth per bag | 1.4 kg (3 lb) or 2.3 kg (5 lb) per bag |
| Reuse | Years, after cleaning | Single use | Single use |
| Storage | Bulky and breakable | Flat until filled | Arrive filled, stack when colonized |
| Visibility | Clear from every side | Clear, but creases hide some grain | Clear, but creases hide some grain |
Where jars win
- Running cost. Once you own the pressure cooker and jars, each batch costs little more than grain and power.
- Small batches and trials. Running three species side by side, or testing a new grain, is easy when each jar is its own small experiment.
- Reuse. Glass and metal lids last for years, and there is far less plastic waste.
- Easy to inspect and label. A jar sits flat on a shelf and you can see the grain from every side, which makes spotting an uncolonized kernel or an early problem easier.
The downsides are real, though. Pressure cooker capacity limits how many jars you can run at once. Colonized grain in a jar knits into a solid cylinder that takes firm taps to break, and glass can crack if you knock it against a hard surface. Homemade lids are the weak point of the whole system: a filter that gets wet or a port that leaks lets contaminants in. And the prep, from soaking to cooling, takes most of a day.
Where bags win
- Capacity. One bag holds what several jars do, which matters when you are spawning into a bulk substrate.
- Break-up. A firm squeeze through the plastic turns a colonized block back into loose kernels in seconds. Loose grain spreads evenly through substrate, which means faster colonization.
- Spawning is quick. You can pour the broken-up grain straight into a bag of substrate and mix, with no scooping out of a narrow jar mouth.
- Light and unbreakable. Bags ship well, store flat before use, and stack once colonized.
On the downside, bags are single use. If you fill your own, you need a heat sealer, and the bags must be kept off the hot walls and base of the pressure cooker (use a rack) or they can melt or puncture. Large homemade bags also need longer under pressure than jars to make sure the center gets hot enough.
Why ready-made sterilized bags skip the pressure cooker
The slow part of grain spawn is not the growing, it is the preparation. Grain has to be rinsed, soaked, simmered, drained, dried on the surface, packed, and then sterilized at 121°C (250°F) under 15 psi of pressure. Boiling is not enough, because 100°C (212°F) does not kill the heat-tolerant bacteria that live on grain. That is why making spawn from scratch means owning a pressure cooker and giving up most of a day.
A ready-made bag has all of that done before it reaches you. It arrives sealed, the filter patch lets it breathe, and you add live mycelium of a gourmet species, such as a liquid inoculant or a commercial grain spawn of the species, through the self-healing injection port. The bag is never opened until the grain is colonized. Our step-by-step inoculation guide walks through it.
Consistent hydration is the other quiet advantage. Grain that goes into a jar too wet is the most common cause of sour, bacterial spawn, and homemade batches vary. A bag hydrated the same way every time takes that variable away.
Which should you choose?
- You already own a pressure cooker and enjoy the process: jars for small batches, trials and grain-to-grain transfers.
- You grow oysters a few times a year and want minimal equipment: ready-made bags paired with a bulk substrate. The cost of a pressure cooker rarely pays off at that scale.
- You are scaling up: bags, either ready-made or filled yourself, because capacity and easy break-up matter more with every batch.
- You want the best of both: many growers keep a few jars for expanding a strain and use bags for the main spawn run.
If you are still deciding how the pieces fit together, our guides to what grain spawn is and grain spawn bags cover the basics, the equipment checklist covers the gear, and the spawn to bulk guide covers what happens once the grain is ready. Choosing the grain itself is its own question: see oats vs rye grain spawn.
Quick checklist
- Jars and bags colonize equally well. The difference is work, cost and handling.
- Jars: cheapest per batch and reusable, but need a pressure cooker, a day of prep and firm shaking.
- Bags: bigger capacity and easy break-up, but single use.
- Ready-made sterilized bags skip soaking, simmering and pressure cooking entirely.
- Homemade grain: 90 minutes at 15 psi for 1 liter (1 quart) jars, about 2.5 hours for bags.
- Whichever you use, keep the filter dry and inoculate through the port without opening.
Frequently asked questions
Are bags or jars better for grain spawn?
How long do you pressure cook grain jars?
Can you reuse grain spawn bags?
Do I need a pressure cooker for grain spawn bags?