Nobody growing mushrooms at home works in truly sterile conditions, and you do not need to. The real goal is narrower: stop contaminants reaching grain or substrate during the short moments it is exposed. Most failed bags trace back to a handful of habits, and every one of them is easy to fix with a spray bottle, a pair of gloves and a plastic box.
Growers often call this "clean technique", which is the more honest name. Here is how to do it properly.
Where contamination comes from
Before the steps, it helps to know what you are defending against.
| Source | How it gets in | The fix |
|---|---|---|
| Air | Dust and mold particles drifting onto an open bag | Still air, a still air box, short open times |
| You | Hands, sleeves, hair and breath | Gloves wiped with alcohol, a mask, clean sleeves, hair tied back |
| Tools and surfaces | Scissors, the outside of bags, the table | Wipe everything with 70% alcohol |
| The grain or substrate | Under-sterilized grain, substrate that is too wet | Proper heat treatment and field capacity |
| The inoculant | Contaminated source mycelium | A clean, trusted source; never use a bag with any sign of contamination |
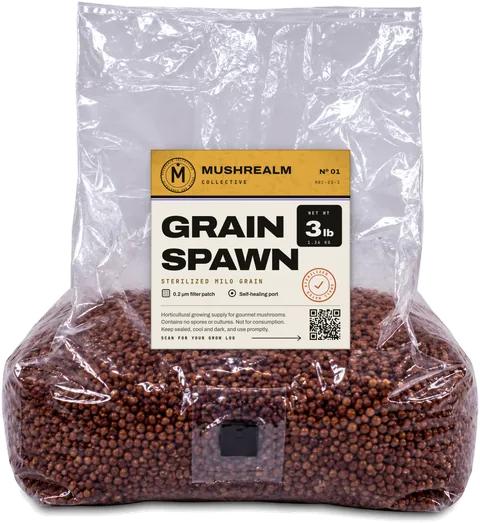
With ready-made bags, the fourth row is handled before the bag reaches you. Our grain spawn is pressure-sterilized and sealed behind a 0.2 micron filter patch, and if a bag ever arrives contaminated or damaged, a photo within 7 days gets it replaced or refunded (returns). Your job is the first three rows and the last one.
Prepare the room
- Pick a small room with a door and no through traffic. A spare room, a clean kitchen or a bathroom all work.
- Close windows and doors, and switch off fans, air conditioning and forced-air heating 20 to 30 minutes before you start, so the air can settle.
- Do the dusty jobs another day. Vacuuming, sweeping, changing bed sheets and handling pets, compost or houseplants all throw particles into the air.
- Keep fruiting bags and anything moldy out of the room. Mature mushrooms and molds both shed a constant haze of tiny particles.
- Wipe the work surface with alcohol and lay out everything you need, so you never have to leave halfway through.
- Wash your hands and forearms, put on clean clothes and tie back long hair.
Use 70% alcohol the right way
70% isopropyl alcohol is the workhorse of clean technique. It beats 99% because the water helps it penetrate and kill microbes, and it evaporates more slowly, so it stays wet long enough to work.
Drugstore rubbing alcohol is commonly sold at 70% isopropyl, which is the right strength. If you buy 91% or 99%, dilute it to about 70% with distilled water.
- Spray until the surface is visibly wet, then let it evaporate or wipe it after a few seconds. It works while it is wet, so do not wipe it straight off.
- Wipe in one direction with a fresh paper towel rather than scrubbing back and forth.
- Alcohol is flammable. No flames, candles, lighters or gas burners nearby, and never inside a still air box, where the fumes collect.
- Never mix alcohol with bleach. If you use diluted bleach on floors or the outside of the box, rinse and dry it first.
- Air the room out once you are finished.
Gloves, mask and sleeves
- Gloves. Nitrile gloves, sprayed with alcohol and rubbed together like washing your hands. Spray again every time you touch anything outside the clean zone: your face, your phone, the lid of the box.
- Mask. A basic disposable mask stops your breath reaching an open bag. Do not talk over open work.
- Sleeves. Bare forearms shed skin flakes and hair. Wear clean long sleeves and spray them, or use disposable sleeve covers.
- Hair. Tie it back or cover it, so nothing falls forward over the work.
How to build a still air box
A still air box works on a simple idea: particles settle when the air stops moving. You need a 60 to 100 liter (roughly 64 to 106 quart) clear plastic tote, a marker, a 10 cm (4 in) hole saw or step drill bit, and some sandpaper or tape, all available at a hardware store.
- Stand the box upside down on its lid. The lid becomes the floor, and the clear tub becomes a cover you can see through.
- On one long side, mark two arm holes about 10 cm (4 in) across, roughly 25 to 30 cm (10 to 12 in) apart, center to center. Place them so your arms come in at a comfortable angle and can still reach the floor of the box.
- Cut slowly at low speed. Rigid plastic cracks if you rush it.
- Smooth the edges with sandpaper or cover them with tape so they do not snag your gloves.
- Wash the box, dry it, and wipe it inside and out with alcohol before the first use.
Optional: taping fabric cuffs or sleeves around the holes reduces the air your arms pump in and out.
How to use a still air box: the working order
- Wipe the table, then the box inside and out, with alcohol. Let it dry.
- Wipe each item as it goes onto the lid: the bags (especially the injection port), scissors and the outer packaging of your inoculant. Arrange them so you never have to reach over an open bag.
- Lower the box over the items and leave it for 5 to 10 minutes so the air inside goes still.
- Glove up, spray your gloves and forearms, and slide your arms in slowly. Fast movements pump room air in through the holes.
- Work low, close to the floor of the box, and never pass your hands or arms over an open bag or port.
- Open, add, close. Keep every opening as short as you can manage: seconds, not minutes.
- Seal everything before it leaves the box, and wipe the injection port again after use.
- Label each bag with the species, the date and what you did.
For inoculating through a port, see how to inoculate grain spawn bags. For spawn to bulk, break up the colonized grain inside the closed bag before it goes in the box, so the open time is only the pour. Our spawn to bulk guide has the full method.
Air flow and timing
Still air versus moving air. A still air box relies on motionless air. A flow hood works the opposite way, sending a constant stream of HEPA-filtered air across the work. With a hood, work downstream of the filter and never put your hands between the filter and an open bag. Never mix the two ideas: a fan blowing room air across an open bag is the worst of both.
Time of day. Work when the house is quiet and the heating is off, so fewer people, pets and drafts are moving dust around.
Clean to dirty. Do the cleanest jobs first in any session: inoculating sterile grain before spawn to bulk, and anything involving colonized or fruiting bags last.
Steady, not rushed. Speed matters less than smooth movements. Knocking a bag or dropping the scissors costs more than an extra few seconds.
Clean up and keep a log
- Seal and label everything before you lift the box.
- Throw away used gloves and paper towels.
- Wipe the box inside and out, and store it closed so dust does not settle inside.
- Move new bags to their incubation spot straight away, off the floor and away from anything moldy.
- Never open a contaminated bag indoors: opening it releases the contaminant into your workspace. Seal it inside a second bag and put it in an outdoor trash can. Our grain spawn contamination guide helps you tell mold from healthy mycelium.
- Keep a simple log: date, species, inoculant source, what you did and where. If contamination appears, patterns show up fast.
If you keep losing bags even with good habits, our list of common mushroom growing mistakes covers the non-hygiene causes, such as substrate that is too wet or spawning too early.
Clean technique checklist
- Still room: windows shut, fans and heating off for 20 to 30 minutes.
- No dusty jobs, pets, compost or fruiting bags in the room beforehand.
- 70% isopropyl alcohol on every surface, item and glove, and no flames anywhere near it.
- Nitrile gloves, a mask, clean sleeves, hair tied back.
- Open bags only inside a still air box, working low and never over an open bag.
- Open, add, close, in seconds. Clean jobs first, dirty jobs last.
- Seal, label, log, and get contaminated bags out of the house unopened.
Frequently asked questions
How do I prevent contamination when growing mushrooms?
Do I need a still air box to grow mushrooms?
Is 70% or 99% isopropyl alcohol better for mushroom growing?
Can I use a lighter or flame inside a still air box?