If you want to grow gourmet mushrooms beyond a single ready-made kit, grain spawn is the step everything else hangs on. It is the bridge between a small amount of live mycelium and a full bag or tray of substrate that can fruit. This guide covers what grain spawn is, why grain works so well, how it is made, and how to decide between buying sterilised grain and making your own.
What grain spawn actually is
Grain spawn is cereal grain (milo, oats, rye, millet and others) that has been hydrated, sterilised and then colonised by the mycelium of one mushroom species. Once every kernel is coated and knitted together with white growth, the bag is "spawn": a living inoculant you mix into a larger, cheaper bulk substrate such as coir and vermiculite, straw or hardwood sawdust.
It plays the role a seed packet plays in a vegetable garden, although nothing in it is a seed. Each kernel is a small parcel of starch and protein wrapped in mycelium. When you break colonised grain apart and mix it through bulk substrate, every kernel becomes its own starting point. Hundreds of starting points mean the substrate gets claimed quickly, before mould or bacteria have a chance to settle in.
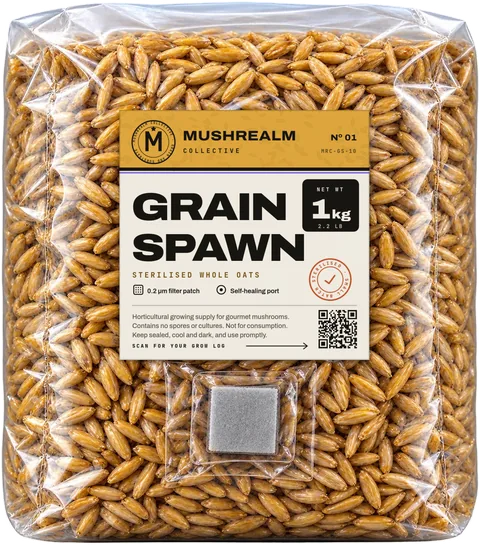
One naming point, because it confuses a lot of new growers: shops, including ours, often sell "grain spawn" that has not been colonised yet. What arrives is sterilised grain in a sealed bag. You add the live mycelium, and the bag becomes true spawn once it is fully grown through.
Why growers use grain
Grain is not the only spawn material. Sawdust spawn and wooden plug spawn are common for logs. For indoor growing, though, grain is the default, for good reasons:
- Nutrition. Grain is rich in starch and protein, so mycelium grows fast on it and carries that energy into the bulk substrate.
- Water stored inside the kernel. A properly hydrated kernel holds its moisture inside, with a dry surface. That gives the mycelium plenty of water and leaves little free water for bacteria.
- Lots of separate pieces. Grain breaks apart into individual kernels, so it spreads evenly through bulk substrate. A solid block of colonised material could not do that.
- Easy to sterilise and standardise. Grain is cheap, consistent and survives pressure sterilisation well.
- Fast recovery. Shaken or broken grain recovers within a day or two because each kernel carries its own food.
How grain spawn is made
Every grain spawn, homemade or commercial, goes through the same four stages.
1. Hydrate
Dry grain is rinsed to remove dust and chaff, then soaked and usually simmered until the kernels are plump with water but not split. The goal is moisture inside each kernel and a dry surface outside. The grain is drained and left to steam off until no water beads on it. Split kernels leak sticky starch, and wet surfaces invite bacteria, so hydration is where most homemade batches go wrong.
2. Sterilise
Hydrated grain is loaded into jars or filter patch bags and pressure sterilised, typically at 15 psi (about 1 bar) and 121°C (250°F) for roughly 90 minutes to 2.5 hours depending on the size of the load. Boiling is not enough: water at 100°C (212°F) leaves some heat-tolerant bacteria that live on grain alive. This is the step that needs a pressure cooker or an autoclave.
3. Inoculate
Once the grain has cooled to room temperature, live mycelium of a gourmet species goes in. The usual options are:
- a liquid inoculant, added with a sterile needle through the self-healing injection port
- a colonised grain transfer from a previous bag (many growers use about 1 part colonised grain to 10 parts fresh sterile grain)
- a commercial grain spawn of the species
Inoculation is done in still air or in front of a flow hood, with clean hands and alcohol-wiped surfaces. Our guide to inoculating grain spawn bags walks through it step by step.
4. Colonise
The bag sits somewhere dark and steady, usually 21 to 24°C (70 to 75°F) for most gourmet species, while the mycelium spreads. When roughly a quarter of the grain is white, growers break up the colonised patches and shake the bag to spread the growth. Full colonisation typically takes 10 to 28 days depending on the species and temperature. Our post on how long grain spawn takes to colonise has timelines by species.
Buying sterilised grain vs making your own
| Make your own | Buy pre-sterilised grain bags | |
|---|---|---|
| Equipment | Pressure cooker, large pot, filter patch bags or jars, impulse sealer, scale | A clean workspace |
| Time per batch | Several hours: rinse, soak, simmer, dry, load, sterilise, cool | Minutes: inoculate and wait |
| Consistency | Depends on your hydration and sterilisation | Hydrated and sterilised the same way every batch |
| Main risks | Wet or split grain, under-sterilised loads, bags damaged in the cooker | Mostly inoculation technique |
| Cost per kilo | Lower once you own the equipment | Higher per bag, no equipment to buy |
| Best for | High-volume growers with space and time | Beginners, occasional growers, anyone without a pressure cooker |
Making your own pays off once you are running many bags a month and already own the equipment. Below that, the time, the gear and the occasional failed batch eat most of the savings.
Our grain spawn is sterilised whole oats in 1 kg (2.2 lb) bags at £14.99. Each bag is fully hydrated and pressure sterilised, then sealed with a 0.2 micron filter patch and a self-healing injection port, so no pressure cooker is needed. If you want the substrate as well, the grow kit pairs a grain bag with CV Prime.
Whichever route you take, the type of grain matters less than getting hydration and cleanliness right. Our comparison of the best grains for mushroom spawn covers the trade-offs between oats, milo, rye, millet and the rest.
How to use grain spawn
Once the bag is fully colonised (white all the way through, no bare kernels, bound into a firm block), it is ready to spawn into bulk substrate.
- If you have time, give it a few extra days to firm up. Dense, vigorous spawn recovers faster after mixing.
- Break the block apart inside the sealed bag with your hands until it is mostly loose kernels.
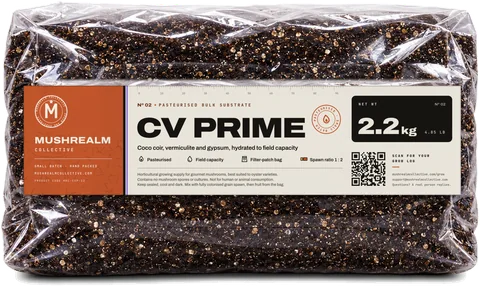
- Mix it into a pasteurised bulk substrate. For oyster mushrooms, CV Prime is made for exactly this: you mix the grain in and fruit from the same bag.
- Use a generous spawn rate. Our kits run at about 1 : 2 grain to substrate by weight. More spawn means faster colonisation and fewer chances for contamination. The grain and substrate planner works out amounts for any number of grows.
- Let the bulk colonise fully, then move it to fruiting conditions.
The spawn to bulk guide covers ratios and mixing in more depth.
Wood-loving species
Shiitake, lion's mane, maitake and reishi fruit best on supplemented hardwood sawdust, which we do not sell. Grain spawn is still how you get them there: colonised grain spawns sawdust blocks or logs well. Oyster species are the exception that makes home growing easy, because they do very well on coir and vermiculite.
Common mistakes with grain spawn
- Inoculating warm grain. Wait until the bag is at room temperature all the way through.
- Shaking too early. Wait until there are clear, actively spreading white patches before breaking them up.
- Incubating too warm. Above about 27°C (80°F), most species slow down while mould and bacteria speed up.
- Ignoring a damaged bag. A punctured bag or a wet filter patch is an open door for contaminants.
- Opening a suspect bag indoors. Green fuzz or a sour smell means contamination. Our grain spawn contamination guide shows what is normal and what is not.
The short version
- Grain spawn is sterilised grain fully colonised by the mycelium of one gourmet species.
- It is made in four stages: hydrate, sterilise, inoculate, colonise.
- Grain works because each kernel holds water and food inside and breaks apart into many separate starting points.
- Making it needs a pressure cooker and several hours per batch; pre-sterilised bags skip straight to inoculation.
- Once colonised, mix it into a pasteurised bulk substrate at a generous rate and let it run.
Frequently asked questions
Is grain spawn the same as mycelium?
Do I need a pressure cooker to make grain spawn?
How much grain spawn do I need?
How long does colonised grain spawn last?