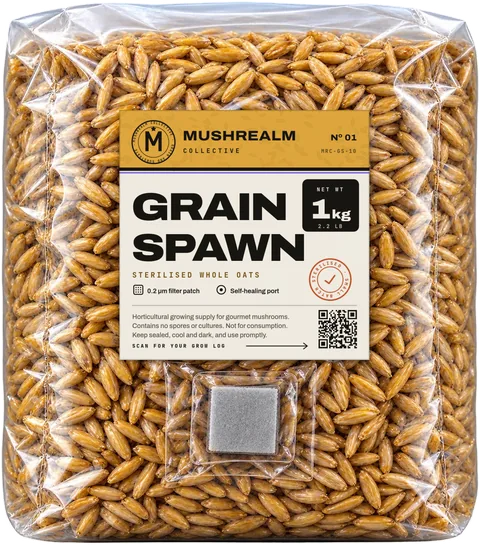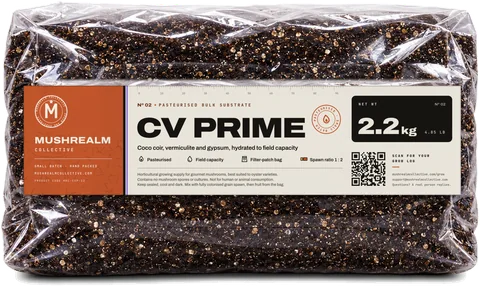
Spawn to bulk is the moment a bag of colonised grain becomes a fruiting block. Done well, the substrate is white in under two weeks. Rushed, or done in a drafty room, it is where most green mould first shows up. Here is how we handle it on the MushRealm bench: which ratio to pick, how to tell the grain is ready, a clean mixing routine and what each stage of colonisation should look like.
What spawn to bulk actually does
Grain spawn is food and inoculum in one: every kernel is a small packet of nutrition wrapped in mycelium. Bulk substrate, such as CV Prime (coir and vermiculite), holds far more water than grain and gives mushrooms a wide surface to fruit from.
When you mix the two, each kernel becomes a separate starting point. The mycelium grows from kernel to kernel through the substrate and knits it into one solid block. More starting points means faster colonisation, and faster colonisation means less time for mould to get a foothold.
Spawn to bulk ratios compared
Ratios here are grain to substrate by weight. Timings are for oyster species at 21 to 24°C (70 to 75°F).
| Ratio | Grain share of the mix | Typical colonisation | Contamination risk | Best for |
|---|---|---|---|---|
| 1:1 | 50% | 7 to 10 days | Lowest | First grows, slower species, rooms on the cool side |
| 1:2 | 33% | 10 to 14 days | Low | The everyday default for oysters on CV |
| 1:3 | 25% | 14 to 21 days | Moderate | Stretching grain once your technique is reliable |
More grain gives more starting points, a faster finish and a richer mix, because the grain carries much of the food in a CV grow. The cost is more grain per block.
Less grain is cheaper per grow, but the substrate sits uncolonised for longer, and every extra day is a day for contaminants. Some growers push to 1:4 or 1:5. It can work with vigorous oysters and very clean technique, but we don't recommend it while you are learning.
Our kits are paired at about 1:2, and that is where we would start.
How much grain and substrate you need
The maths is simple:
- Grain = total mix ÷ (1 + ratio number)
- Substrate = grain × ratio number
So a container that holds 3 kg (6.6 lb) of mix at 1:2 needs 1 kg (2.2 lb) of grain and 2 kg (4.4 lb) of substrate.
One 1 kg (2.2 lb) grain bag spawns 1 kg (2.2 lb) of substrate at 1:1, 2 kg (4.4 lb) at 1:2 and 3 kg (6.6 lb) at 1:3. Our starter kit pairs 1 kg (2.2 lb) of grain with 2.2 kg (4.9 lb) of CV Prime, about 1:2.2.
For several grows at once, our free spawn to bulk calculator works out how much grain spawn and CV Prime you need for any number of grows at the ratio you choose.
When is grain spawn ready?
Spawn too early and the bare kernels become food for mould. Spawn too late and the mycelium has lost some of its push. Check all five:
- Fully colonised on every side. Turn the bag over. No bare, glossy kernels on the bottom, sides or corners.
- A solid block. The grain is bound together and feels firm when you press the bag.
- Clean colour. White only. Small yellow droplets on oyster spawn are normal metabolites. Any green, grey-black, orange or wet, slimy patch is not.
- A fresh smell near the filter patch: mushroomy or neutral. Sour, sweet-fermented or rotten means bacteria.
- A few extra days. Give it 2 to 5 days after the last kernel turns white so the mycelium consolidates into the grain.
Don't leave it much longer than a week or two after that. Oysters will start pinning in the bag, and old spawn colonises more slowly. If you need to wait, most species hold in the fridge for a short while. Pink oyster is the exception: cold damages it. If you are unsure whether a patch is contamination, our grain spawn contamination guide walks through the usual suspects.
A clean spawn to bulk method
Prep (both methods)
- Choose a small room with no drafts. Turn off fans, heaters and air conditioning, close the windows and let the air settle for 10 to 15 minutes.
- Wipe the work surface with 70% isopropyl alcohol.
- Wash your hands and forearms, put on nitrile gloves and spray them with alcohol.
- Wipe the outside of both bags and your scissors with alcohol.
- Break the colonised grain into loose kernels while its bag is still sealed.
There is more on this in clean technique for mushroom growing.
In a grow bag
- Cut open the grain bag and the substrate bag.
- Pour the grain into the substrate bag and hold the top closed in your fist.
- Shake, tumble and knead until it is evenly mixed, with no clumps of grain and no pockets of plain substrate.
- Press it gently into an even layer. Good contact helps the mycelium bridge the gaps, but packing it hard squeezes out air.
- Fold the top over a few times and clip it.
In a fruiting container or tray
- Wash the container with hot soapy water, dry it and wipe it with alcohol.
- Hold back two handfuls of substrate, then mix the rest with the grain in the container (or in a clean bag, then tip it in).
- Level it to an even 5 to 10 cm (2 to 4 in) and press lightly.
- Sprinkle the reserved substrate over the top in a thin layer so no grain is exposed. Bare kernels on the surface are a common place for mould to start.
- Put the lid on and cover any air holes with micropore tape until it is colonised.
Never add water. CV Prime is already hydrated to field capacity, and extra water is the fastest route to bacterial problems. See field capacity explained.
Spawn to bulk timeline
What a 1:2 oyster spawn typically looks like at 21 to 24°C (70 to 75°F):
| Day | What you should see |
|---|---|
| 0 to 2 | Little visible change while the broken mycelium recovers |
| 3 to 5 | White fuzz reaching out from each kernel into the substrate |
| 6 to 9 | Patches joining up; more white than brown on the surface and sides |
| 10 to 14 | A fully white, firm block; oysters may start forming pins |
At 1:1, take a few days off. At 1:3, or with slower species, add a week or more. The mycelium makes its own heat, so the middle of a block can run a few degrees above room temperature. If the room creeps past about 26°C (79°F), move it somewhere cooler.
When it is fully colonised, move it straight to fruiting conditions. Our oyster mushroom walkthrough picks up from here.
What to watch for during colonisation
Look through the plastic; don't open it to check.
- Green patches, often white at first: Trichoderma mould. It won't recover. Seal it and throw it out, away from your other grows.
- Grey, very fine, cobwebby fluff that races across the surface: cobweb mould. In a bag, it is usually best discarded.
- Wet, slimy pockets or a sour smell: bacteria, usually from substrate that was too wet or grain that was not fully colonised.
- Water pooling in the bottom: a little condensation is normal, but a puddle means the mix is too wet.
- No progress for 4 to 5 days: often a cold room. Check the temperature before anything else.
- Yellow droplets on oyster mycelium: normal metabolites, not contamination.
Quick checklist
- Grain fully colonised on every side, plus 2 to 5 days.
- Still room, alcohol on everything, gloves on.
- Break the grain up before opening the bag.
- 1:2 by weight is the default; 1:1 for insurance, 1:3 to stretch.
- Mix evenly, press lightly, cover exposed grain, add no water.
- Colonise at 21 to 24°C (70 to 75°F) and leave it closed.
Frequently asked questions
What is the best spawn to bulk ratio?
How long does spawn to bulk take to colonise?
When should I spawn to bulk?
Should I break up grain spawn before spawning to bulk?
Is the spawn to bulk ratio by weight or volume?